Showing posts with label challenge. Show all posts

Sunday, 20 January 2013

Faery Fantasy

Hi and welcome. I normally do layouts for the ARTastic challenge, but this time I decided to do a reverse canvas, so I could add more depth in layers. I've also gone for a fantasy theme, with 'wings' as the main feature. Pop over to have a look at the site to see what the fabulous design team has been up to. http://artasticchallengeblog.blogspot.com.au
Gesso was applied to the background of the canvas and the frame around it. Once dry, the whole piece was stippled with acrylic paint to which I applied a retarder to help colours blend and to slow down the drying time. The whole piece was then sprinkled with salt to lift off some colour and leave an interesting finish. I didn't paint a recognisable landscape, just let the paint do the work. Using the paint retarder and salt held things up for a while... took a lot longer to dry than anticipated (even with quick bursts from the heat gun).

Canvas stipples with acrylic paint


To fit with the impression of foliage I stamped on flowers and leaves, fairies and butterflies.


Stamping done with Distress and Archival Inks. Wool lines are criss-crossing the canvas.

Below, a close-up shot showing stamps


For the wings, I used a heavy watercolour paper and watercolour paints using various techniques: wet-in-wet, dropping in colour, variegated wash, stippling and salt spatter. These colours were painted on as solid blocks, dried, cut around and folded in half with the reverse side showing


Wings in various shapes and styles were drawn. When cut out, additional features and shading was added using Lyra aquarelles, Lumieres, Acrylic Glitter Glaze and bling. One set of wings was formed from a bought chipboard flourish, coated with Opals enamelling powder (Currawong) and finished with crystals.


Now I would like to welcome you to Shaylee's Fashionable Faery Wings Shop. This exclusive little shop caters for very discerning fairies who want a unique, hand-crafted set of wings for a special occasion or outfit.


Shaylee, when I met her, was very friendly and very keen to show me her designer wings. She had these displayed on fine spider web filaments, held in place by some cooperative butterflies. (A couple must have flown off when I arrived).
If you find one of the elusive fairy glades, be sure to make yourself known and ask about Shaylee's shop. You may be lucky to find her, because she wanders from place to place, loving to travel and meeting other fairy folk and finding new ideas.
The sign on Shaylee's shop is written in Gaelic, which I hear, is a language familiar to all fairy folk. (I'm hoping that I have translated this correctly and I apologise to any Gaelic-speaking readers, if this is incorrect in any way... information came from various sites on the net)


A fibrous wool, material leaves and flowers and a velvet butterfly completed the piece.

Thank you for visiting.I love reading your comments and words of encouragement. Cheers, Di


Thursday, 17 January 2013

Butterflies

Hi! and welcome to my post. Today I'm showing my entry for ABAC Challenge 10 featuring wings
http://anythingbutacard.blogspot.com.au/

The piece started out as a Kaiser craft precut MDF bookend kit .

Basic Kit

The board was gessoed before transforming. The base and end boards were daubed with Distress Stains, which were then brushed across the surfaces before they dried.

Stained boards

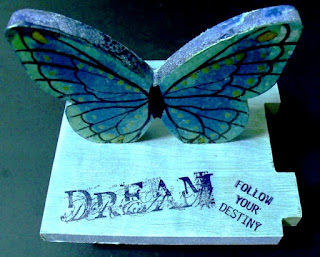
The butterflies were heat enamelled. The black line work was originally done with black Glossy Accents, but I found that these peeled off quite easily! Luckily I'd only completed one side of a butterfly before I discovered this. Lines were then drawn on using a permanent marker. Gold markings were done with a metallic acrylic paint.


Stamping was added, using StazOn. Letters on the end board were from a bought glitter board alphabet set. These were daubed with metallic Distress Stains. The butterfly embellishment found languishing in my stash was silver originally, but I coloured it with alcohol inks.


The whole piece was then constructed and glued with PVA. So now I have a set of bookends, functional and pretty at the same time. I was going to add more embellishments, but considered the purpose and have decided that I could use the flat surfaces as a display area for small knick-knacks, if I chose to do so.         


Materials Used:
gesso,  Distress Stains: Peeled Paint, Bundled Sage, Brushed Pewter,  Burnished Brass, Weathered Wood, Broken China;  Opals Embossing Enamels: Banksia (soft gold), Macquarie (vibrant blue), Daintree (soft gold-green), Dove Lake (a deeper blue);  StazOn: Midnight Blue;  Alcohol Ink: Sailboat Blue;  Peel-off Markers;  Lumiere Paint: Sunset Gold;  Darkroom Door Stamps: Discover;  Stamping Up Stamps: Just Believe.

Now, time to reorganise some space so I can use my new craft additions. Thank you for visiting and thank you for leaving crafty comments.  Cheers, Di

Sunday, 30 December 2012

Rachel Rosina Davison

Hi! I hope everyone had a joyful Christmas with family and friends.
 Today I'm showing a framed fusion collage done at "Creating Bliss" craft camp, (organised and run by Julie http://timetocreate-handmadetreasure.blogspot.com.au/  ) in May this year (and it was a blissful and creative camp with many new techniques learnt and passed on to others). This is also my entry for http://anythingbutacard.blogspot.com.au challenge,  anything goes or favourite project of the year.


Framed portrait of Grandmother


Enlargement of section showing details of lace and fabric leaves

The photo is of my grandmother, Rachel Rosina Davison (nee Harvey). We believe that this was taken at her wedding in 1901. This is one of two wedding photos I have of her, and since it was taken from a copy of a copy of the original, some of the finer details of her dress have been lost in the reprinting processes.
Julie has called this a fusion technique, because much of the adhering of fabric and lace to papers, and papers to the backing card was done by ironing on Steam a Seam 2. Various vintage style papers were used to go with the photo and the era in which it was taken. These were distressed slightly by smooshing on stains and adding stamped images that seemed to fit. The mat under the photo was embossed to give the piece some additional texture. The fabric leaves were stained and misted with glimmer mist before applying the Steam a Seam 2, and then fussy cut before ironing on to the background. The lace which I had in my stash begged to be used for this as it reflected not only the fashion of the day, but also the lace on Grandma's dress. The only other embellishment was the stick-on pearls, again another fashion statement of the era.
I don't remember my grandmother very much, being only about 3 when she died. However, I think she would have liked the treatment of this portrait as she apparently loved sewing, particularly embroidery, as well as making clothes for her children. A photo of  all of the children showed her use of lace on the frocks of the girls in the family.
I loved this technique and will, hopefully, make a similar piece showing my mother at a similar age.
Thank you for stopping by and Happy New Year! Here's to more creative crafting in the coming year.
Cheers, Di

Saturday, 22 December 2012

Really Mum!

Hi! Today I've had fun with a layout which I'm entering in the ARTastic Challenge using bold background paper or paint at http://artasticchallengeblog.blogspot.com.au . The background paper for this was covered in various textured squares and rectangles  in different hues of blue. To this I've daubed on thick white and dark grey acrylic paint, and added a notepad teddy paper which was given a wash of acrylic paint as well.


Angel's and Bella's thoughts about teddies!

The gorgeous bundles, Angel and Bella belong to friend and art guru, Julie, at http://timetocreate-handmadetreasure.blogspot.com.au/. They form a  fantastic welcome committee for all visitors. These bundles of joy are cute, cuddly, loving, inquisitive but can be a little wilful and obsessive at times. The day these photos were taken was during a workshop Julie held, using Docraft Wellington Bear stamps and to add to the 'beary' fine day, there were some teddy bear guests. Wellington would have wondered what all the commotion was about! The teddies became the focus of attention for the girls and they were determined to find out about these interlopers.... so it was up onto a chair and then the table for a closer inspection. Hence, the mournful and plaintive expressions on their faces. In the end, the bears were put away so the girls could regain their sensibilities and with much hilarity, our workshop could continue.
The layout has been completed with faux stitching on the thickers for the title, footprint brads and a stamped Wellington, coloured  with Lyra Aquarells.
I think puppy power made the day!
Thank you for visiting. Merry Christmas and a Happy New Year.
Cheers, Di

Thursday, 20 December 2012

Tag It For Christmas

Hi! I'd like to share my entry into http://anythingbutacard.blogspot.com.au/ Challenge: Celebrating the light, or seasonal holiday.
This tag has used the same style of magnetic folder as the one used for My Little Book of Doodles. These are by Petaloo and are very versatile, coming in a couple of different sizes and assorted colours.
Strips of background paper for the cover and inserts were stamped and smooshed with Distress Inks. These were also used for the embellishments throughout.

Outside cover of tag showing embossed embellishments, washi tape and tags made from Darkroom Door stamps.

Washi tapes were used and to make them adhere more permanently were placed on top of double-sided tape.
'Wellington' Bear stamps by Docraft and Darkroom Door Christmas stamps were used for the tag.


Inside cover showing Wellington bear and darkroom Door stamps.

These tags can be changed easily for recipients and if needed, additional pages or photos can be added.

 
Insert with back page and front page.

Inside page (centre)


The whole piece was secured with glittery wool. Some touches of Kindy Glitz completed the tag (just to give it some Christmassy sparkle).                                                                          
Thank you to everyone who has stopped by my blog and left comments. These are always greatly appreciated and I also love visiting your blogs which are very inspirational. I'll take this opportunity to wish all of my readers a fantastic Christmas filled with peace, happiness and love. Thanks again for stopping by.                                                                                                                                   
 Cheers, Di.


Wednesday, 5 December 2012

Hi!
First, it was a HUGE surprise to see that I had been chosen as one of the Fabulous Four featured artists for my layout for challenge 6: a stitch in time at http://anythingbutacard.blogspot.com.au/   So thank you to the team for this.
Today I'm showing an altered box which has a nautical theme, to be entered for challenge 7 at ABAC.
The box was a fairly plain one picked up at a local shop. Basically painted white and blue with a couple of beach stencils and wooden fish. Potential? Yes!


Side of box before alterations


The base was sprayed with Glimmer  mist (Sea Glass and Silver) and while wet, covered with cling wrap, scrunched and moved around and left to dry. The cling wrap was removed when dry. This left an interesting pattern. The base and interior of the box was stamped with coral and shells (Darkroom Door) with Stayzon Midnight Blue and Teal Blue.


Interior of box showing creased markings and stamping.
 
The exterior of the box was given a coat of Viva Croco Azure, left to dry overnight, before stamping with the Stayzon and Distress Stain Brushed Pewter.


A net was made from an onion bag and filled with shells and treasures from the deep. Dolphins were cut from packaging and given an Opals Enamelling Powder treatment (Zeehan) Starfish were made from wooden stars treated to an Opals finish. Liquid Pearls were added to these, fish and some of the shells decorating the box.


The box was completed with craft buttons, (pirate ship and fish, with the shanks cut off), shells and shell discs and small cane baskets (fish baskets).


I've popped in a piece of sea sponge and coral... so it could be a display box for those sea treasures or a storage box for art/ craft equipment, lotions and potions........ anything really.
It was fun to make over.
Thanks for stopping by. I appreciate comments that are left and enjoy reading them. Come again.
Cheers, Di


Tuesday, 20 November 2012

A Time For Us

What a lovely surprise to be chosen as one of the featured artists for the challenge using black at anythingbutacard.blogspot.com.au . After seeing other entries, I didn't think 'My Little Book of Doodles' had a chance, but I am pleased I submitted it.
Today my 'Time for Us' layout is my effort to combine both stitching and a time theme for the current ABAC Challenge.


The photos are of self and husband, taken at a ball in Lismore in 1973, just a few months after our wedding. I'm lucky to still have the photos, even though they are showing some signs of damage, having rescued them from one of those 'magnetic' sleeved albums which were popular at the time. Some of my photos of our early life together, couldn't be saved in time , and coloured photos have turned a peculiar red. I'm hoping that these can be restored.
I've used several background papers, including a paper doily, which have been embossd, stamped, distressed and smooched with distress inks in bundled sage and vintage photo. One of the background papers has images of clocks on it.


The ornate clock is chipboard from the 'Dusty Attic' range.This was given a light smoosh with distress ink then covered with Sepia Glossy Accents, to give it an antique look.
Flowers were punched, spritzed with green and bronze Glimmer mists, scrunched and left to dry before being unfolded and assembled. Swirls of Liquid Pearls were added.
The old watch face was originally my mother's and given to her by my father, sometime during the Depression. It could well have been a wedding gift as they were married in 1929 (New Year's Eve). The watch was part of my 'something old' on my wedding day.
Lace was dyed with glimmer mist. On it I have hand -stitched flower and square -shaped sequins and polished shell heart beads.
It certainly has been an interesting and rewarding time for us... both of us, born in the Chinese Year of the Dragon, one already 60 and self, with a 60th rapidly approaching and our 40th wedding anniversary next year.
Thank you for visiting. Please come again. Cheers, Di

Friday, 16 November 2012

enchanted glade

Hi! Today I'm showing my layout for the ARTastic Challenge, which has to feature stitching and fabric.
I've based it around a created mixed media canvas completed at http://timetocreate-handmadetreasure.blogspot.com.au a couple of Saturdays ago. This was used as a background for a bronzed fairy sculpture, book- loving owls and various gumnuts, pine cones and pine roses, to create my base photo, of a fairy in a secluded glade.


Photo created using my fairy I've named Ariella, playing her zither. The mixed media canvas is in the background.

The background paper was altered by masking sections with white crayon, then smooching with Distress Inks: Bundled Sage, Weathered Wood and Black Soot. The crayon resist was rubbed off and the paper then randomly stamped with ferns, fairies and butterflies.

altered background paper

Tree trunks were from corrugated cardboard wet embossed using Opals Embossing Enamels.
The lyrebird, was cut from a piece of embroidered work I completed as part of a High School project, many moons ago. This was stem stitched onto very fine linen.Lyrebirds are one of Australia's native birds. They live in forested regions, but are rarely seen because they are very shy. Their tail feathers, when raised in a display, are shaped like lyres, hence their names. They are, however, wonderful mimics,copying other birds and if you can't see them in a forest, you may certainly be hearing them. They even mimic human-made sounds such as chainsaws, perfectly! To hold the cut piece together I ironed it onto a piece of fusible web, Steam-a Seam 2 and also layered over it, in the same process a piece of chiffon.


My fairy bower was made from strips of wool fibre sewn together and encased in a leaf-patterned chiffon. Stitched to this were 'fairy lights' made from drops of crystal beading.


The leaves edging the bower, were cut from the same chiffon, using a heat cutting tool. This not only cut, but also crinkled and sealed the edges. Great to use! Bits of wool fibre were then added to represent moss and Old Man's beard. The wool bobbles from some fibre, were cut, teased out a little and stitched onto the log and ground and became mushrooms.


I think Ariella looks very happy and contented in her secluded bower, playing her zither for her friends. Maybe If I  listen very carefully, I may even hear it next time I go walking through a forest!


Thank you for visiting my enchanted fairy glade. I hope you will come again.
Cheers, Di


Monday, 5 November 2012

My Little Book of Doodles

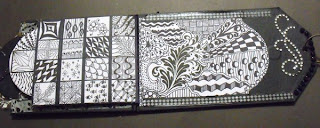
Hi! Today's post is all about my entry for Anything But a Card Challenge, using black. I don't usually have a problem with this, but wanted to try something other than a layout. I've been working on some special Christmas projects with a special "Girls Rock" group at the school where I had taught for 34 years, before retiring, using Petaloo Magnetic tags. These are brilliant as they can be used to create many projects, including mini-booklets for a special memory folder, which the girls did for Christmas. While these were being designed I started thinking about the challenge and came up with the idea of making a doodle booklet. Again, this Incorporated art techniques I had done with my classes over the years, where the students had to "Take a line for a walk" and then fill in the shapes made with interesting designs.This not only taught them about patterns, but also about the concepts of space, balance and contrast. Their artworks also became functional, in that they were often used as centrepieces for book covers.


Front cover


The front cover was decorated with grey and black patterned Washi Tape, patterned vellum, which I hand embossed, embossed acetate from my stash and chipboard flourishes heat embossed with Opals Embossing Enamels in Currawong (black) and Zeehan (silver). I also added a doodle drawn with Ranger Embossing pen and dusted with Perfect Pearls and finished with strips of bling and metallic braid.

Inside pages showing inchie sized doodles

My little booklet can be added to as I find or develop interesting patterns. Some have already been used as a background for a layout I'm working on.
I have used the idea of 'inchies' in which to draw the patterns; a small surface area, and a way to have heaps of different designs. As I don't have an inchies frame stamp, the squares were hand drawn (after searching for a ruler in inches, not as easy as you think, because of our metric system). This framework has been scanned to the computer for future designs. All patterns were drawn with a superfine Sharpie.


The inside front cover feature 2 ATC's using doodling done in white gel pen and finished with Washi tape.


The inside back cover has a doodle centred around a stamped image (inspired by craft Stamper magazine, Nov. 2012 issue. Thank you, Lisa). A swirl of bling, black beading and Washi tape completed this.
The insides are held in place by zig-zag binding, allowing for additional pages to be easily slipped in.
This was fun to do and I now have something that I will use. As my folder is already fatter inside then intended, I've added a binder ring and some pretty metallic fibre wools to help hold it together, and also gives me a way to hang it.
Thank you for visiting. Cheers, Di

Wednesday, 24 October 2012

Autumn is a second spring

Hi! Today's post is for the Anything But A Card Challenge: Halloween or Fall.
The photograph for this layout was taken while holidaying in Tasmania, at Hobart's Botanical Gardens, May 2010. This spectacular tree was in all of its autumn splendour, so we were lucky to capture the moment, before the leaves started to seriously fall. While we have some gardens with various species of maples growing in our local area, the colours aren't nearly so brilliant... our weather doesn't become cold enough.


Autumn is a second spring where every leaf is a flower.

For the layout. I stamped the green background paper with Picket Fence D.S. and added some teased out fibre. The brown paper was spritzed with glimmer mists : Coffee Shop, Sugar Maple and Black Cherry. These colours were also used on the distressed corrugated cardboard, cut into the shape of a maple leaf. Edges of the brown paper were distressed, and some sections inked with Distress Inks: Dried Marigold, Rusty hinge and Weathered Wood.


A hand made leaf,  using chiffon, hand-stitching and liquid pearls to finish.

Leaves were die cut from various papers, including altered papers left over from previous projects. I also added some chiffon handmade leaves.
A few swirls and flourishes on the page to give the idea of wind and movement, completed the layout.

Thank you for visiting, Cheers, Di

Friday, 19 October 2012

Smile

Hi! Today I'm featuring a layout I'm entering in the ARTastic Challenge, where the challenge this time was to have handmade flowers. For this I decided to have a go at something new for me... quilled roses!

Layout showing two techniques of quilling.
 
Papers I used were different width quilling strips as well as pearl lustre papers I cut from A4 sized sheets. I also used some fringed and quilled flowers from the same papers.


Close-up of flowers.


The decorative frame around the photo was given a metallic look by the use of opals Embossing Enamels, in Rosevears (a deep rose/burgundy), Mountain Berry  (a deep pink)and Tarkine (a pale green).  The background paper, was distressed heavily by wetting, crumpling and tearing. In some sections, other snippets of paper and lace were inserted. Punched paper edges helped add a lacy effect to tie in with the dress in the photo.
The photo is the earliest one I have of myself and was taken when I was 2 years and 2 months old. This was a studio photo, and part of a group of 4 taken; this one in black and white and 3 others in colour. At this time, these would have been coloured by hand. These showed that the dress I was wearing was pink and white. It was made of some light material, probably organza, and was heavily starched. I don't remember the dress or the photo session, but for some strange reason, I do remember the bow I had in my hair... pink with blue Bambis on it. Strange what the old memory bank retains!
Thank you for visiting and while you're here, why not pop over and have a look at my other pages, especially if you're gluten free, as I'm starting to put up recipes I have found work, and which are enjoyed by friends with no allergies, as well.
Cheers, Di

Monday, 8 October 2012

Untamed

Hi! Today's post is also for the ABAC Challenge using Bling.
The photo used for this layout was taken one early September morning at Lennox Head, NSW. The waterfall tag completed for the last ABAC challenge was the A-Ha moment for this layout.
First of all, to give a subtle glimmer to the card stock (representing sand) I lightly spritzed with the Tattered Angels range of sprays: Sandy Beach Chalkboard, Suede and Walnut Gold Glimmer Mists. When dry, small puddles of Opals Embossing Enamels (Rosevears, Macquarie and Sandstone) were added to the lower third of the page.


My seaside interpretation

I sewed on a net of variegated wool which had a ceamy bobble edge (foam). Through this I wove in strands of metallic wool, silvery wire threaded with beads and mother-of-pearl shell, and strings of beads. I also added real shells, starfish, die cut shells and seahorses in metallic paper.
A fringed, silvery wool was used to represent sea spray.


   Close up showing some of the netting, starfish, shells, beading.

                                                       
Seaweed was formed from the metallic wool and finished with some crystal bead drops. Words from Jacques Cousteau were also formed into the shape of seaweed.


             "The sea, once it casts its spells, holds one in its net of wonder forever."

The title was die cut from pale pink photo board, stamped with a swirly stamp design ion versamark and embossed with Opals Zeehan enamelling powder. To give a little more definition on the page, the letters were lightly smooched with Weathered Wood distress ink.


I feel that I have achieved my A-ha moment with my interpretation of what could be found on the seashore.
Hoping you feel also the sense of wonder and peace I had when taking the photo.
Thank you for visiting. Di