Friday, 28 August 2015

CHANNELLING POSITIVE VIBES!!!!

Hi! It has been a while since I last posted, but I have a major health issue I'm coming to terms with at the moment. Doing what I love is helping greatly and today I'm sharing a couple of projects.
The first I'm entering  into the Kraft Plus challenge. You can see what the team has done over at:
kraftpluschallenges
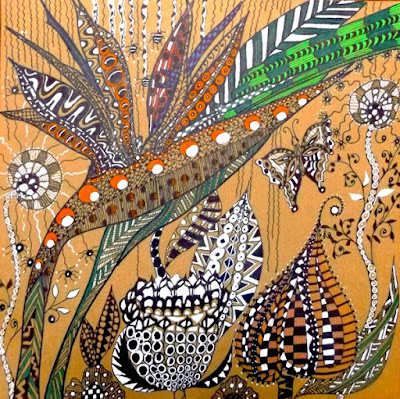
This is the first time I've participated in this challenge, but when I saw that the criteria was to add the element of zentangling I couldn't resist!  This was done while recuperating  from my last lot of surgery..... very therapeutic.
I've created a fantasy garden, based around a Bird of Paradise plant.


The second was my August DT piece for ARTastic, using a black and white photo of one of my Tawny Frogmouth visitors to the garden. The additional criteria was to add texture so that it was a feature of the background. I've stencilled leaves using modelling paste and added gems and fibres.


Pop on over to: artasticchallengeblog  to see how  the rest of the team has interpreted this month's inspiration artwork.
 
 
Cheers for now. Di

Wednesday, 15 July 2015

GRAB THE BROLLIES!!!

Hi and welcome. As I'm writing this post, the temperature outside has dropped and I know we're in for another chilly night.... just right for snuggling up in a warm doona!
Our inspiration at ARTastic this  month was based on the artwork of Shirley Charlton (aka Shirlroma) called "Umbrellas, wet street". 
I loved this piece, with its wet, reflective appearance, the pops of colour from clothing and umbrellas and the texture on the pavement. 


I had a photo taken on our last holiday in Tasmania, showing the reflective view of yachts and old buildings on the waterfront area of Hobart, and the rain falling on the nearby Mt Wellington. This, was just right for our theme and added criteria this month. Minutes after taking this photo we had to make a dash for cover... no brollies on our holiday!


The background was stencilled onto white card, using a new stencil which I thought went so well with a flagstone look.

 
This was left to dry slightly before spraying with various ink sprays and building up layers of colour using Glimmer Mists and Lindy Stamp Gang Sprays. These gave a beautiful metallic , watery sheen to the whole of the background. Once these were dry I sprayed sections with Dylusions Ink Spays and let them dribble freely down the page... helped by misting with water.


Umbrellas were made from papers which had also been sprayed or inked in some way. This one I stamped with versamark and heat embossed using a white embossing powder. It was then overstamped and coloured with Inca Gold 'Rose Quartz'.


Two of the brollies were cut from smooshed Distress Inks, using some of this year's colour releases. two were cut from paper sprayed with Dylusions Ink Sprays, and the remaining one on the centre of the grouping was cut from tissue paper which had been painted with Dylusions Acrylic paints (the most yummy colours!)
 

The title was also cut from the same types of paper and then given a coat of Glossy Accents to give them a wet look. This was also applied to the ribs of the umbrellas.
A lot of messy fun, using techniques and mediums I love to play with.
If you want to play with us, pop on over to:artastic and check out what the team has done. We'd love to see your art here.
Cheers, for now.
Di


Thursday, 2 July 2015

JONATHON LIVINGSTON SEAGULL?

Hi and welcome. Wow! July already... where has this year gone!
This month at Pixels and Paper we have a fabulous photograph inspiring summery days, brilliant whites and blues and maybe even the ocean.... which is where I've chosen to go.
I had a particular photo, taken by my son, in mind (as well as a completely different layout idea to what I finished with), before the AHA! moment struck.


First, I painted a seascape on A3- sized heavy watercolour paper. This was done with a combination of mediums: modelling creme (brushed on with both wet and dry brushes as well as being scraped on), 3D stamping paint, acrylic paint and a touch of permanent black marker pen.


To this background I glued an A4 copy of the seagull photo I was originally going to use. I tried this as a whole photo, but decided to cut it out instead...... heaps better!
I haven't painted for a while so I really enjoyed doing this as a background.... opens up all sorts of possibilities with other photos!


This is our inspiration photo... what a stunning place. (Santorini, Greece). Pop on over to:pixelsandpaper and check out what the rest of the DT has done.... awesome pieces as usual!
We'd love to see your art here.
Thank you for popping by and particularly if you leave a little love as well.
Catch you again soon.
Cheers, Di

Monday, 22 June 2015

THE HAZARDS

Hi and welcome. Today, I'm showing a layout which was started over a year ago and finally completed... and a perfect one for this month's theme at Anything But a Card: Out and About.
This layout was started at a workshop at :timetocreate where Julie demonstrated a technique we were to use: spraying white card with metallic paints, swiping over sections with daubers and when dry, putting through an embossing folder.


The board I prepared was cut into different sized strips and put onto black cardstock. I also used an A4 card to tear and distress additional strips of black.. These were placed on the background and some sections were then versamarked through a stencil, and heat embossed... and that's where it was left.

It was left until fairly recently, when iIretrieved it from my UFO pile (getting smaller). I decided to add additional embossing over the black background, some through a stencil and some by just dropping onto the page and carefully heating from some distance, adding more powder as it started to melt. In this way I was able to get flicks of embossing that looked like sea spray on some sections.

 
I added die cut circles put through an embossing folder. inked with silver and also heat embossed with a fine embossing powder, then added the photos.
The photos were taken on our last trip to Tasmania on the beautiful north-east coastline at a charming village, Coles Bay. This bay overlooked the cliff area known as The Hazards.  This is an area we wish to return to and explore further.
There's still time to check out and maybe even enter this month's challenge, so why not pop on over to:anythingbutacard and check out what my teamies have done this  month.
 
Thank you for popping by and leaving some love.
Catch you all again soon.
Cheers, Di

Monday, 15 June 2015

FLIGHTS OF FANTASY!!!

Hi and welcome. My DT piece for ARTastic this month has been formatted around two photos taken of some rather unusual markings on  tree with the required additional criteria of wood veneer and/ or birds.
I see owls, one in flight and the other on a branch.


I wanted a quirky look to reflect that of our inspirational artwork this month., a painting by Luka Va called "Bird King".
 
 
To achieve this, apart from the photos, I smooshed some manilla card with Distress Inks directly from the pads ( fossilized amber, cracked pistachio, abandoned coral and mermaid lagoon) and then stamped with archival black. The stamp I used was a funky mushroom edging. I added wooden mushrooms, inked with some of the same colours and then glazed with Glossy Accents.


I also added some additional wooden birds which were treated the same way as the mushrooms. To the whole of the background I glued cut and broken pieces of timber veneer to give the whole, a rustic look. Timber veneer leaves were also added. 


 I cut some feather shapes from my leftover smooshing and stamped on the letters for the title. Some extra words from Darkroom Door completed the piece.


I wonder what you see in the photos. I know some of my teamies have seen different things. It would be a hoot to find out.
While you're here, why not pop on over to:artastic to see what the rest of the team has done. You will be amazed! We'd love for you to join in.
Catch you again soon. Thank you to  those who have left such encouraging  comments.
Cheers, Di

Wednesday, 3 June 2015

SOAR

Hi and welcome. This month at Pixels and Paper our photo to inspire you features hot air balloons and quite an iconic Aussie structure... the windmill seen so often on farms and outback stations.


I've taken the idea of the balloons and the windmill and have created a layout without photos.


The balloons feature some of the colours from the inspiration photo and have been made in three different ways:- Iris Folding, Venetian Folding and the one in the centre at the bottom of the page, by gluing strips of paper to a balloon template. The lower edge of the paper has then been stamped  with trees and of course, a windmill. This stamping was also on top of the balloon to make it look as if it was rising behind the treeline.
The title "Soar" was cut from card which had been gessoed through a stencil then sprayed with Dylusions Ink while wet.

Pop on over to:pixelsandpaper and check out what the rest of the team has done. We'd also love to see your artwork here.
Catch you again soon.
Cheers. Di

Monday, 25 May 2015

JUST A PEEP

Hi! The DT at Pixels and Paper are presenting a tutorial each month on some techniques we use. It's been my turn this month and I am showing just a sample of what I have done. To find out more about what I did and how I did it, pop on over to:pixelsandpaper and check it out.


Catch up with you all again soon.
Cheers, Di

Monday, 18 May 2015

FAVOURITE PLACES

Hi and welcome. Today I'm sharing a canvas featuring some of the places I love to visit in my local area as well as an artwork by an indigenous Australian artist, Sally Morgan, as my DT piece for Anything But A Card. Our theme this month has been  "Inspired By the Masters".


This artwork by Sally Morgan is a screen print "Aboriginal Land" from 1995. This depicts images of  six different Australian landscapes including desert, rivers, mountains and trees. The whole piece has been encircled by a rainbow serpent to give strength and unity to the print. It is also a creation spirit in Aboriginal Australia.

I chose a 50 x 35cm canvas so that I could work a number of photos on a larger area. The background was sprayed with Dylusions Inks and Lindy Stamp Gang sprays. A border of leaves was stencilled on with Viva Modelling Creams and Ferro combinations.


I also stencilled on a water effect with the same products. The photos I used all have some significance with each other, as well as some Aboriginal significance. 
The top photo is an aerial view of Mt Warning, named so by Captain Cook and known as Wollumbin by the local Aboriginals. This peak and the rim of mountains around it are the remains of a huge shield volcano which covered this area. With the erosion over the millennium, the beautiful Tweed Valley, Richmond Valley and the Border ranges were formed.
The remaining photos are of the Nimbin Rocks, Whian Whian Falls (taken one very misty morning),  rapids at a creek near Protester's Falls, and overflow from Rocky Creek Dam, after a period of flooding rain.
Rain that falls in the Mt Warning and Border Ranges catchment area impact these creeks and dams, hence the water connection on the canvas.
Many of the towns and villages, particularly in the Tweed have Aboriginal names, including the home town of my childhood and teenage years, Murwillumbah.
They are all a part of rainforest areas and that is why I have chosen to use the leaves to connect them. My bright colours, inspired by Sally Morgan, have been used in the flowers that I've made. These represent lillypilly flowers which are a typical rainforest tree. These were painted onto card using modelling cream and then streaks and dots of pearl pens. Additional leaves were stamped onto mop-up card and cut out.
Pop on over to: anythingbutacard and check out what masters the rest of the team has chosen and how they've been inspired.

Catch you again soon.
Cheers, Di
Friday, 15 May 2015

STARS IN OUR EYES

Hi and welcome. This month's inspirational artwork at ARTastic is "The Return of the Young Prince" by Sarah Beetson, with the additional criterion of the use of stars.


For my layout this month I have chosen some of the colours depicted in the artwork and constructed an iris folded star as the background mat for the photo I've used.


One of the papers used for this was one of my experiments with a new stencil and Neon inks.
The photo I've used was taken of my soon-to-be husband and self, not long after our engagement in 1973.  The photographer was one of my bridesmaids to be.


Additional stars were made from some of the same papers and were highlighted with dots using black or gold Sharpies. The border was done with a gold Sharpie and I added black stars.

Thank you for dropping by and while you're here, why not pop on over to:artastic and check out how the rest of the team has used the artwork. We'd also love to see your art here.

Catch you again soon. Cheers for now.
Di

Sunday, 3 May 2015

BLUEBIRDS OF HAPPINESS

Hi and thanks for coming by. For Pixels and Paper this month, we have a delightful image, evoking memories of  the past... a fitting image for Mother's Day, celebrated in Australia next Sunday.


This month I have taken the blue colours inspired by the 'Bluebird of Happiness', the lacy edge on the embroidery and the floral elements and have incorporated these to produce a layout predominantly in shades of blue, white and cream.
My mum loved embroidery and crocheting and I'm fortunate to have items she made. The doily on the hoop in the image also brought back some childhood memories of my first attempts with embroidery... I did a piece that looks remarkably similar to this one!


The photo is of myself as a junior bridesmaid at my sister's wedding. The gift my sister gave me was a double Bluebird of Happiness brooch, which can just be seen on my dress. I still have this piece along with a bracelet, signet ring and locket, which were subsequent gifts from the family for birthdays and Christmas. I gave the page a shabby, distressed look and also used dry embossing techniques on vellum. The velum had a small floral pattern and I used a ball stylus to emboss the reverse side, giving the piece the opaque white raised look that replicated the flocking on the fabric of my dress... a flocked  spotted nylon which was so fashionable in the '60's!
I added a crocheted doily and also an embroidered doily. Flowers were diecut from the same papers I used on the layout as well as from some watercolour paper. The technique I used for this particular paper will be revealed later in the month at Pixels and Paper. All edges were smooshed with Prima chalk edgers.
Pop on over to:pixelsandpaper and check out how the rest of the team has used the inspiration image this month.
Catch you again soon.
Cheers, Di

Monday, 20 April 2015

IT'S GOLD!!!! A TAG FOR ABAC

At Anything But A Card this month, the focus has been on GOLD!
For this I have made a tag using black cardstock as a base. This was sprayed with gold glimmermist.


A butterfly was diecut from a manilla folder which started life as a mop up piece. It was sprayed with the gold mist as well, then dry embossed. The raised areas were highlighted with Delicata gold ink (absolutely THE best gold ink I've used). Some glittery blue sections were added using Viva Decor Perlen- pen.

The flower was made from glitter paper with an overlay of leaf skeletons (purchased), also inked with the gold ink and edged with the blue glitter. Gold pearl pen was also added to the glitter petals.
To finish the tag I added the stamped sentiment, woodchip butterflies and flower centre and gorgeous braid (black and antique gold).
Pop on over to:anythingbutacard and check out what other members of the team have done with our "Fool's Gold" theme. We'd love to see what you come up with (as long as it's not a card of course!)

Catch you again soon.
Cheers, Di

Thursday, 16 April 2015

NATURAL BRIDGE

Over at ARTastic this month, we have a fabulous inspirational artwork to use... a piece called Frozen Music,  full of colour ad suggested movement  by Roy de Maistre .


I have taken advantage of our added requirement of swirls to complete a double-page layout, with doodled flourishes and swirls using a silver Sharpie. This has been done as a vertical piece in keeping with the photos.


The photos are of the Natural Bridge at Numinbah,on the rim of the Mt Warning crater, about 30 minutes from the small township of Murwillumbah on the far North Coast of NSW. My layout is reflecting the photos showing a flow of water from a creek and its progression, tumbling down a steep rocky outcrop into a cavern where it cascades into a pool before once again splashing out into a small creek. As a child I enjoyed visiting this area and wandering along the track to the cavern beneath. We always called the site the Natural Arch but somewhere over the course of time this was changed to Natural Bridge. It's a great place to visit, especially after a period of good rainfall, when the cascade is even more spectacular. At the right time in the evening the cavern is filled with little bursts of light from the glow worms.
Close up of page 1


Close up of page 2

The background is on a pearlised cardstock and water drops have been cut from glitter cardstock. I've added strands of glitter yarn, fabric and paper orchids in the colours taken from our inspirational painting, acetate butterflies and dragonflies and painted chipboard mushrooms. The edges have a drawn border of water droplets, again using a silver Sharpie.

We'd love to see what you could do with our inspirational artwork and of course the added criteria of swirls. These can be in the form of doodling, swirls on your background paper, or added embellishments. Pop on over to: artastic and check out what the rest of the team has done using our artwork for this month.

Catch you again soon.
Cheers, Di

Thursday, 2 April 2015

PRACTICE

Hi! Thank you for stopping by. This month at Pixels and Paper we have a great photo inspiration... perfect for a male perspective.
For this, I took some of the darker colour tones  and used the idea of wheels and cogs to create a layout using photos of my son aged 8 or 9, enjoying his bike in  our yard.


The background paper from  Fab scraps was the perfect paper for this layout. Cogs were diecut from foil shim and then embossed using 2 different folders; one with gears and cogs and the other with a metal grid pattern.
Pop on over to: pixelsandpaper to have a look at what the rest of the team has done with this photo.


We'd love to see your artworks in our challenge this month.
Catch you again soon,
Cheers, Di

Monday, 30 March 2015

NECTAR

Hi again. This month has had five Sundays and at Anything But a Card, this means a small mini challenge based on the number FIVE!!

For this I have done a layout using photos of shrubs that used to be in my garden and the gorgeous rosellas that sipped the nectar of the flowers.


I designed a template and cut the photos using this. The background has been stamped and then heat embossed using Lindy Stamp Gang powders (Orbit Olive Gold).  Gold and black Sharpies were used to doodle a frame, additional leavers and the title.

You have this week to share your "Five" creations if you'd like to. Pop on over to: anythingbutacard  and check out what some of the team has been up to. 
Catch you again soon,
Cheers, Di

Saturday, 28 March 2015

DISRUPTION AT TIME TO CREATE

Hi! It was my turn to post for the Time To Create Disruptives this week and I chose to play with gesso, sprays and modelling paste.
The results of this play was to make a set of six cards. I'll just show you one of these.


To find out more about the cards and how they were constructed, pop on over to: timetocreate Friday Disruptives.

Catch you again soon,
Cheers, Di

Sunday, 15 March 2015

INTO THE WILD at Anything But A Card

Green with envy is the theme this month at Anything but A Card. I've gone with the green component, using a photo taken in Tasmania...Horseshoe Falls at Russell Falls National Park. .... and it was certainly green, with gorgeous tree ferns and rocks covered with thick, long strands of  moss everywhere one looked.


The background was covered with panels of different green card stock, stamped with Darkroom Door stamps. The same stamps were used for the leaves which were then fussy cut, blinged up a bit with 3D stamping paint and then arranged on the layout. I used a curved arrangement to suggest movement of wind and water. Additional features included a punched strip, a postcard style paper that was perfect... into the wild... and a sprayed, die cut tissue paper dragonfly.


Pop on over to:anythingbutacard and check out what the rest of the team has done for this month's challenge. We'd love to see your work here.
Cheers for  now,
Di.

STRIATED SUNSET

Hi and welcome. This month's criteria at ARTastic is to use a quote on whatever you create. As the colours in the inspirational artwork were reminiscent of some of my sunset photos, this is what I decided to go with.


A quote from John Ruskin, 'At sunset nature is painting for us... day after day... infinite beauty."   has been used for this, along with some of the colours, stripes and splotches from the inspiration artwork.


The features of stripes, patterning and colour has also been extended onto the black background through the use of stencilling with swipes of colour using texture pastes, sprays and dimensional pearls. Some of the background colour was also applied using the serrated edges of plastic knives. I have also used sprayed and torn tissue paper, again using the colours from this month's artwork.


Background showing stencilling and scraping. Coppery tones were added later.

Please drop by the ARTastic site and have a look at how the rest of the team has played with this month's theme. You'll be in for a real treat! Check it all out at:artastic


Thank you for dropping by. Your comments always give me a buzz and brighten my day.
Catch you soon.
Cheers, Di


Sunday, 1 March 2015

PAMELA FINDS THE RAINBOW CASTLE AT PIXELS AND PAPER

Hi and welcome to our first day of autumn... but really, really not feeling it as it's still quite hot outside. Maybe it's the last burst of summer temperatures before some cooler days kick in ..the sooner the better!
Pixels and Paper have this month's challenge up and running and although I've done a layout, it certainly isn't using a photograph, rather, an image from a child's story book.


This month's challenge spoke to me of the Wizard of Oz (originally) but then I changed my mind and the direction I was going to take, when I came across a delightful book by Juliet O'Conor, which was a compilation of illustrations from Australian children's literature.  In this I came across many illustrations from books I'd had as a child, or read at school in the early years, or had bought later in my career. There were also illustrations from books I'd never heard of and this particular one from a story called "Pamela Finds The Rainbow Castle" written and illustrated by Babs McDonald in 1947 was just perfect!
This illustration was copied and all  I added was some glitter from Viva decor pens and of course, Pamela's shoes had to have a red sparkle!
The background was sprayed with Dylusions sprays and then overlaid with Lindy Stampgang and perfect Pearls sprays, to give a glimmery, rainbow look.


I added a dragonfly die cut from tissue paper which had also been sprayed with the same glimmery sprays. The wings turned out gorgeously opalescent with a soft sheen.


Handmade roses, again from sprayed and die cut and then crumpled tissue paper were added. Leaves were finished with the viva pens and flourishes using the same were added.
Pop on over to: pixelsandpaper to check out what the rest of the team has done with this month's image.


We'd love to see how you interpret it and also maybe see your art here as well.
Cheers for now,
Di


Monday, 16 February 2015

FRIENDSHIP TAG

Hi again. This month Anything But A card Challenges has its theme centred around friendship. For this challenge I have made a very large tag.


The base is made from black cardstock. This was stencilled with modelling cream. The next layer is a wallpaper sample and then I've added a topper from Graphic 45 Botanical Tea Collection.
I'd been thinking that a number of my fiends are some distance away from me and though we rarely see each other, when we do have the chance to catch up in person, or on the phone, our conversations flow easily. I decided that I would make up a quote to say this... True friendship transcends time and distance.  I think that most of you would have friends that this is true for.
To complete the tag I added 2 of my new  and rapidly becoming favourite, dies and embossing folders from the Tim Holtz range. Both were cut from card I had sprayed with various Lindy Stamp Gang sprays and then stencilled with modelling cream.
The ribbon at the top is a gorgeous hand- dyed silk ribbon I purchased at a local craft fair.
Pop on over to: anythingbutacard and check out what the rest of the team has done for this challenge. We'd love to see your art here.

Thanks for stopping by.
Cheers, Di